
By Wrench Monkey Sidekick (A New Article Weekly)
Tired of shelling out $100+ at the shop every time your rear tire wears down from those spirited canyon carves or daily commutes? Changing your own motorcycle rear tire isn’t just a money-saver—it’s a rite of passage that boosts your confidence behind the bars. With the right tools and a couple of hours in your garage, you can handle this job solo.
We’re talking a tubeless tire here (most modern bikes), but we’ll flag tubed variations where needed. Remember, every bike’s a snowflake—consult your owner’s manual for model-specific quirks like axle torque specs or swingarm adjustments.
This guide keeps you safe and rolling smooth. Let’s break it down step by step. Pro tip: Do this on a cool bike, in a well-ventilated space, and with a buddy if you’re new to it.
Tools and Materials You’ll Need
Gear up like you’re prepping for a track day. Here’s the essentials:
- Jack or paddock stand: To lift the rear end.
- Socket set and torque wrench: For axle and caliper bolts (torque to spec!).
- Valve core tool: For deflating/inflating.
- Bead breaker tool or C-clamps: To pop the tire bead loose.
- Tire irons (2-3): Long metal levers for prying.
- Spray lubricant: Silicone-based or Windex for slippery beads.
- Bead lube: Soap, hand sanitizer, or dedicated lube for the new tire.
- Air compressor: With a chuck for motorcycle valves.
- Rim protectors: Plastic inserts to avoid scratching your rims.
- New tire: Match size, load rating, and speed index to your bike. Check rotation direction (arrow on sidewall).
- Optional: Balance beads or weights if you’re going full pro.
Safety First: Don’t Be That Guy
Wear gloves and eye pro: Tires can snap like a bad breakup.
Bike on center stand or securely jacked: No wobbles mid-job.
Deflate fully before breaking beads: Explosive air release = bad day.
Torque everything: Loose axles lead to vibes or worse.
Test ride short and slow: Check for wobbles before hitting the highway.
If your bike has ABS or traction control, disconnect sensors per manual to avoid codes.
Warning: Botched installs can cause blowouts. If in doubt, hit the shop.
Step-by-Step: From Worn to Winning
Park on level ground, kill the engine, and let it cool. Shift to neutral.
- Raise the rear wheel off the ground using a jack under the swingarm or a paddock stand. Secure it—no tip-overs.
- Loosen the axle nut (usually 17-24mm socket) but don’t remove yet.
- For chain-driven bikes: Slack the chain by loosening the adjusters on both sides of the swingarm. Slip the chain off the sprocket (use a chain tool if rusty).
- Remove the brake caliper: Two bolts usually (14mm). Hang it with a zip tie—don’t let it dangle on the hose.
- Slide out the axle (note washer/spacer order—snap a pic). Pull the wheel back and off the swingarm. If it’s a belt drive, just note tension adjustments later.
Boom—wheel’s free. Lay it flat on a towel to protect the rim.
Step 2: Deflate and Break the Bead
Time to evict the old rubber.
- Unscrew the valve cap. Use the valve core tool to remove the core—air rushes out like a sigh of relief. Hold tight; it’s forceful.
- If tubed: Unbolt the valve stem from the rim and pull the tube out later.
- Break the bead (seal between tire and rim): Wedge your bead breaker between tire and rim, hammer it around both sides until you hear pops. No breaker? Use C-clamps: Clamp over the sidewall, tighten to squash the bead into the rim’s drop center, then move 6-8 inches and repeat. Spray lube to keep it from re-sticking.
- Flip the wheel and repeat on the other side. Stubborn bead? More lube and patience.
Deflating the tire and breaking the bead Breaking the bead with a tool
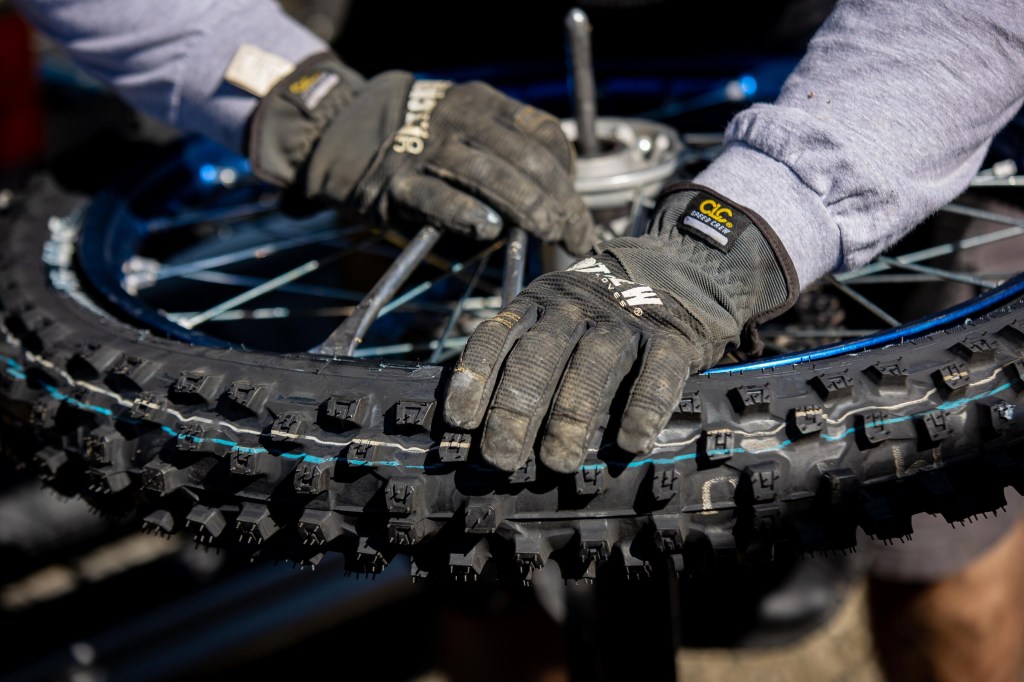
Step 3: Pry Off the Old Tire
The fun part—demolition derby for your rubber.
- Insert a tire iron under one side of the bead (near the valve, but not on it). Pry up and over the rim edge. Hold it with one hand.
- Add a second iron 4-6 inches away, pry and hook over the rim. Work around clockwise, adding irons as needed (like leapfrogging). Use rim protectors to baby that pretty rim.
- Once one side’s off, flip the wheel. Repeat on the other side. The tire should flop free—wiggle if needed.
- Yank the old tire off. If tubed, fish out the tube and inspect for leaks.
Clean the rim: Wipe out dirt, old lube, or debris with a rag. Inspect for damage—dents mean shop time. Prying off the old tire with tire irons Using tire levers to remove the tire
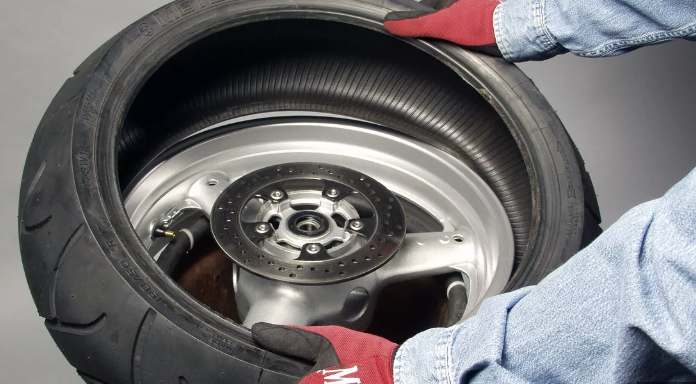
Step 4: Mount the New Tire
Fresh rubber incoming—handle with care.
- Lube the new tire’s beads generously with bead lube. Note the rotation arrow (must match forward wheel spin) and red balance dot (align with valve stem).
- If tubed: Insert the new tube (deflated) into the tire, tuck the valve through the rim hole, and bolt the stem.
- Start one side: Position the tire’s bead under the rim lip opposite the valve. Use tire irons to pry the bead up and over, working around. It’ll fight—lube helps.
- Flip and do the other side. The tire should seat loosely in the drop center.
- Reinstall the valve core. Hook up the compressor and inflate to 10-15 PSI. Bounce the wheel; listen for the “pop” as beads seat. If not seating, let air out, lube more, and try again—ferrule the bead with a spoon or mallet.
- Top to full pressure (check sidewall or manual, e.g., 36-42 PSI rear). Spin the wheel: No wobbles? Good. Add balance beads if you’re fancy.
Lubricating the new tire Aligning the balance dot and mounting the tire Inflating to seat the bead
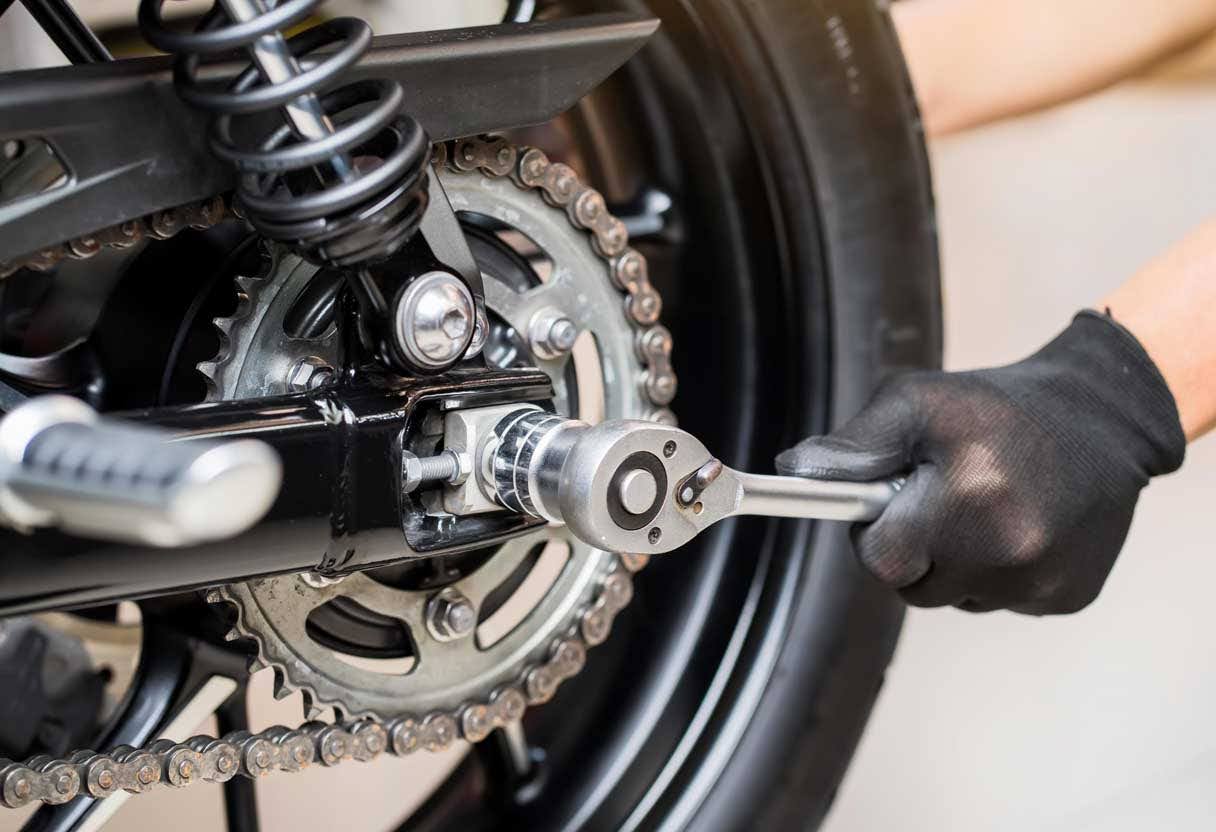
Step 5: Reinstall the Wheel
Reverse the removal, with precision.
- Slide the wheel back into the swingarm, aligning sprocket/belt with chain.
- Insert axle from the left (usually), add spacers/washers in order.
- Reattach caliper and torque bolts.
- For chain: Loop it on, adjust tension (manual spec, usually 1-1.5 inches slack), and torque axle nut (e.g., 80-100 ft-lbs—check yours).
- Belt? Re-tension per manual.
- Lower the bike, double-check torque, and inflate to riding pressure.

Step 6: Final Checks and Break-In
- Spin the wheel by hand: Smooth? Brakes grab evenly?
- Short test ride: 1-2 miles, feel for vibes. Re-check pressure after 50 miles.
- Balance if needed: Shops do static balancing cheap, or use a DIY stand.
Troubleshooting: Bead won’t seat? More lube and short bursts of air. Wobble? Check alignment or balance. Chain too tight? Readjust or lube up.Final inflation and readiness check
Wrapping Up: Ride On, Wrench Monkey
There you have it—your rear tire transformed, wallet intact, and skills leveled up. Next time you’re dodging potholes, thank your inner mechanic. Got a cruiser, sportbike, or ADV? The basics hold, but tweak for your ride. Share your war stories in the comments—we’re all in this two-wheeled family.


You must be logged in to post a comment.